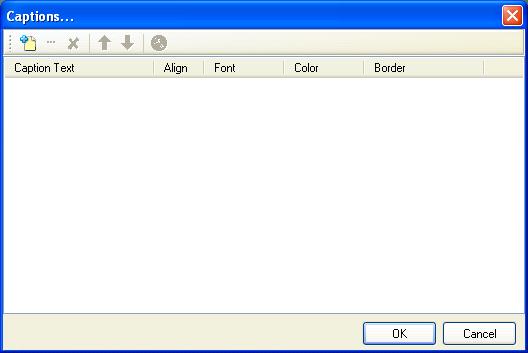
This effect allows you to add titles on your image. When you activate this effect you can select an existing title or create new ones.

Click the
![]() button to create a new caption.
button to create a new caption.

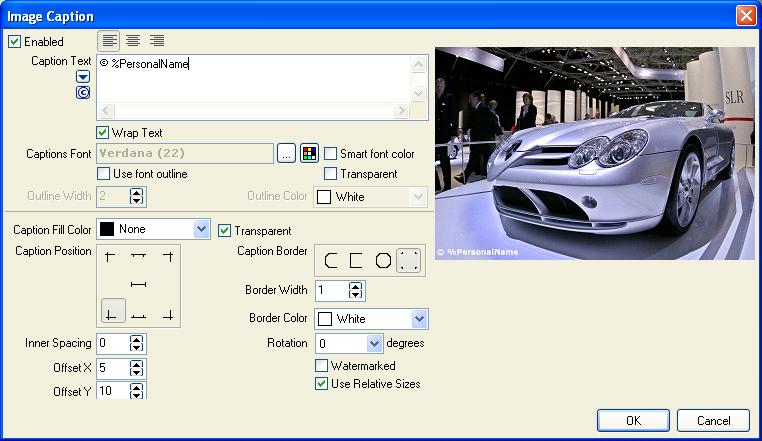
Enabled |
This allows you to switch the caption of or off. If this is your first caption, leave it switched on. |
Alignment
|
Here you can specify how the caption title text should be aligned. Options are ôleft alignedö, ôcenter alignedö and ôright alignedö. |
Caption Text |
Enter the text you want to use for your caption. You can optionally use variables (macro or % commands). These commands will be translated to real values once you apply the caption. The preview at the right will show the command as the command text.
You can select commands by clicking the drop down arrow
|
Wrap Text |
When enabled and the specified text exceeds the width of the image it will be wrapped to the next line. |
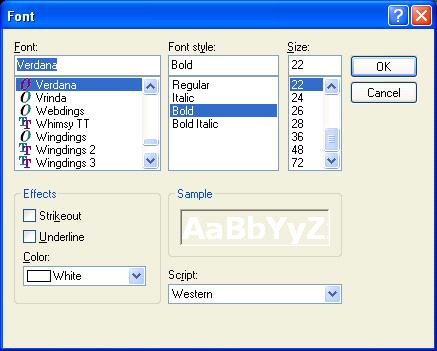
Captions Font |
Click the
|
Font Color
|
Although the font selection dialog also allows you to select a color for the font it is limited to a pre-selection. With this button you can select any possible font color. |
Smart Font Color |
By selecting this option, IDimager will calculate the color of the image and determine which color will give good contrast. That color is called the ôsmart colorö and will be set as the fontÆs color. |
Use Font Outline |
By selecting this option tell the caption to add an outline to the font.
When selected, you can set the outline width (pixels) and the outline color. Optionally set the font to transparent to hide the inside of the font and only keep the outline.
This is an example of an outlined and transparent font caption:
|
Caption Border |
Here you can select if a border should be used around the caption. The options are: ôRoundedö, ôsquareö, ôcircularö and ônoneö.
Select ônoneö to remove the caption border. |
Border Width |
Select the width of the border |
Border Color |
Select the color of the border. If you also specify a ôcaption fill colorö (see below) you can set the same color if you donÆt want to see an additional color. |
Caption Fill Color |
If you have selected a caption border, then this field allows you to fill that border with a specific color. Select ôTransparentö to create an empty border.
This is an example of a bordered caption:
|
Caption Position
|
Select the position that matches the position where you want to place your caption. By using the X-Offset and Y-Offset fields you should be able to position the caption anywhere on the image. |
Rotation |
Select how the caption title should be rotated. Options are ô0 degreesö, ô90 degreesö, ô180 degreesö and ô270 degreesö. |
Watermarked |
Select this option is you want to watermark the caption into the colors of the image. This will create a ôsee throughö effect. When watermarking you need to make sure you select the right colors for the font and/or border. The fist-rule to follow is: the darker the color, the more it is seen through. The lighter the color the less it is seen through.
Black and watermarked becomes invisible. White and watermarked has no see through effect. Every color in-between is good. It is advised to use a dark gray shade of color for the best watermark effect. |
Use relative sizes |
When you define a caption, you most likely design it against the example at the right. When you select this option, IDimager will keep in mind that the caption is designed for this format and will scale all sizes when this caption is applied to a different size of image. That makes this option very important if you are designing captions that should be generally usable, no matter what image size it is applied to. |


